
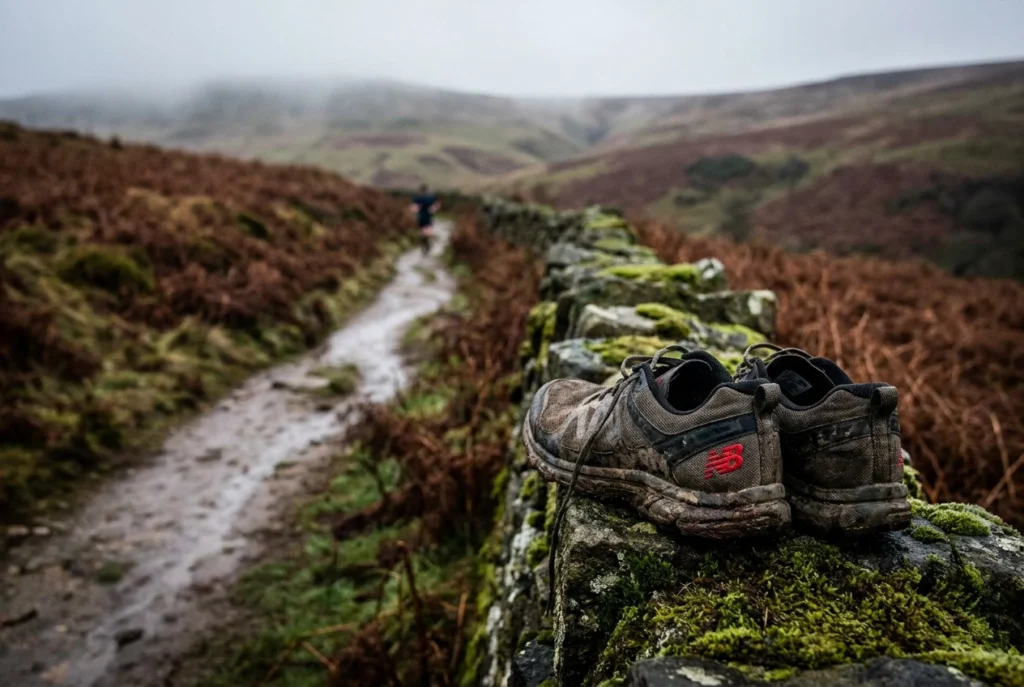
Most trail runners make the same mistake when buying trail running shoes: they open a browser, search for the best-rated model of the year, and order whatever sits at the top of a global review list. The problem is that those rankings were rarely built around chalk downland in the South Downs, peat bogs on Dartmoor, or the relentless wet grit of a Scottish glen.
UK trails are their own category entirely. The moisture, the mud, the varied geology, and the season-to-season surface changes mean that a shoe celebrated in Colorado or the Alps might be a liability on your local routes.
This guide puts terrain first, the way shoe selection always should. Before brand names or price points enter the picture, you will work through the four main UK trail surface types, understand what lug depth and stack height actually do for you, and figure out when a waterproof membrane is worth the breathability trade-off. By the end, you will have a practical shortlist of trail running shoes matched to the ground beneath your feet, not to someone else’s mountain.
Why UK terrain demands a different approach to shoe selection
Pick up any global “best trail shoes” roundup and you will find test terrain that reads like a highlight reel: alpine scree fields, Andean singletrack, the granite slabs around Lake Tahoe. Those are real test conditions, and they produce genuinely useful data, but they share almost nothing with a saturated peat bog on Dartmoor or the greasy chalk switchbacks of the South Downs on a wet November morning.
UK trail conditions follow their own logic. High moisture frequency is the defining factor, but the challenge goes beyond “it rains a lot here.” The same route that demands deep mud-clearing lugs in February can harden into cracked, rutted clay by August. UK peatlands alone cover around 3 million hectares, and much of that ground shifts between waterlogged and compressed depending on the season, creating surfaces that change character faster than any single shoe specification can track.
The most common mistake UK trail runners make is straightforward: buying the globally top-rated model without filtering for the surface they actually run on. A shoe engineered for dry mountain terrain can become a liability on saturated peat, where outsole design and heel lockdown matter far more than the overall star rating.
Trail running in the UK has grown steadily, and the shoe market has responded with more models than ever across every budget band. More choice without a clear framework just produces more confusion.
This guide introduces a terrain-first approach. It classifies UK surfaces into four distinct categories and works through outsole specification, stack height, and waterproofing decisions before any brand name enters the conversation. If you are also researching your first dedicated running shoe, our guide to buying running shoes for new runners covers the foundational fit and foot-type principles that apply across both road and trail.
Start with your terrain. Everything else follows from there.
The four UK trail surface types and what each one demands from a shoe
Those four categories map directly to the framework above. Here is what each one requires from a shoe.
Boggy moorland and saturated peat (Dartmoor, the Peak District, the Scottish Highlands) is the most demanding UK surface. You need deep, widely spaced lugs that shed mud with each stride rather than packing into a slippery platform. Tight lug spacing clogs immediately on wet peat. Heel lockdown is equally critical: boggy ground creates genuine suction that pulls a loose heel counter off mid-stride. Outsole rubber must grip in standing water, not just on dry surfaces.
Chalk downs and compacted clay paths (South Downs, North Downs, Chilterns) behave like two surfaces depending on weather. When dry they are firm and fast; when wet, chalk becomes a greasy skid-pan. Shallower lugs with tighter spacing maximise surface contact, and a stickier rubber compound holds on slick, fine-grained surfaces. Deep lugs offer no advantage here.
Rocky limestone or gritstone terrain (Yorkshire Dales, Peak District edges, Snowdonia) demands underfoot protection above all else. A rock plate or reinforced midsole shields against sharp stone strikes. Moderate lug depth provides traction between rocks without the instability that very deep lugs introduce on hard, angular surfaces. A snug midfoot and heel prevent lateral foot shift on uneven ground.
Mixed-use woodland and bridleway trails are where most recreational UK trail runners spend their time. These surfaces shift between firm-packed earth and soft mud with rainfall. A versatile lug pattern in the 4 to 6 mm range handles that variation without the compromises of a specialist mud or hard-ground shoe. If you are also weighing features to consider for the best waterproof running shoes, the mixed-terrain category is where that decision becomes most nuanced.
The key discipline is honesty about your primary surface, not the dramatic run you do once a month. If 80 percent of your miles are on bridleways and forest paths, that is your reference point for every decision that follows.
Lug depth and spacing: matching outsole pattern to your surface
Once you have identified your primary surface type, the next decision is lug depth and spacing. These two variables are the most important outsole specification for UK trail runners and map directly onto the terrain categories above. Getting them wrong is the most common reason an otherwise decent shoe feels dangerous underfoot.
Deep lugs for soft and boggy ground
On saturated peat, wet moorland, and anything resembling a Dartmoor bog after October, you want lugs of 6 mm or deeper with generous spacing between them. Wide gaps allow mud to eject from the outsole with each stride. Narrow the gaps and mud packs in, the outsole becomes a smooth platform, and grip disappears. A soft-ground shoe should look almost aggressive underfoot, with distinct, separated pins rather than a dense, close-packed tread.
Shallower lugs for firm and technical ground
On chalk downs, compressed gravel paths, and dry gritstone, deep lugs are a liability. They reduce surface contact and can feel like running on stilts on hard-packed terrain. A lug depth of 3 to 5 mm with tighter spacing increases ground contact and delivers more stable, predictable traction. This is the outsole spec to prioritise on South Downs bridleways or Peak District edges in summer.
Rubber compound: the variable most runners overlook
Lug geometry only tells part of the story. A soft, sticky rubber compound grips wet chalk and slick rock far better than a hard-wearing compound built for durability on dry trails. Check the compound specification when comparing models. If you run frequently on wet chalk or polished limestone, compound quality matters as much as lug depth.
The depth-without-spacing mistake
Two shoes can share identical 6 mm lugs and perform completely differently on boggy ground. If lug spacing is tight, peat fills the gaps within the first kilometre and the outsole clogs flat. Always assess spacing alongside depth, not instead of it.
The mixed-terrain compromise
If your routes shift between surface types week to week, a staggered lug pattern at 4 to 5 mm depth offers the most practical range across UK conditions. It is not the peak performer on deep bog or baked chalk, but it handles both adequately. If your foot shape or width affects how an outsole loads, see guidance on wide running shoe fit before finalising your choice, since fit interacts with how evenly the outsole contacts the ground.
Stack height and underfoot protection: how much cushioning your terrain actually needs
Once you have your outsole sorted, the next variable to nail down is what sits above it: the midsole stack.
Stack height is simply the total thickness of material between your foot and the ground. A higher stack cushions impact and absorbs fatigue; a lower stack puts you closer to the surface, giving you sharper proprioceptive feedback and a more connected feel underfoot. Neither is universally better. The right choice depends on where you run.
Rocky and technical terrain (Yorkshire Dales, Snowdonia): a moderate to low stack combined with a rock plate is the most effective pairing. The rock plate does the protective work, shielding your foot from sharp limestone or gritstone edges, so you do not need to pile on foam to compensate. Keeping the stack relatively low maintains agility and lets you read the ground beneath you, which matters when every footfall is slightly different. Research into stack height and running stability confirms that lower stack conditions produce higher perceived stability, a useful data point when you are picking a line across a technical ridge.
Boggy and soft moorland: protection from sharp objects is rarely the concern here. The fatigue case matters more. Each stride on saturated peat or deep moorland mud costs slightly more energy than a stride on firm ground, and a higher-stack midsole with good rebound properties helps offset that cumulative drain on longer outings. Think of the foam as working for you between strikes, not just softening them.
Chalk downs and compacted bridleways: a mid-stack shoe without a rock plate is usually the right call. A very high stack on firm ground adds unnecessary height and introduces a small but real stability penalty on lateral movements and cambered paths, because the elevated platform raises your centre of gravity. If you have ever felt oddly wobbly on a sloped bridleway in a heavily cushioned shoe, that is likely the cause. If stability on varied terrain is a wider concern for you, the guide to stability running shoes covers how midsole geometry and support features interact with your foot type.
The practical rule: confirm your terrain type first, then match rock plate presence and stack height to it. Cushioning is a secondary adjustment, not the starting point.
Waterproofing in UK conditions: when a GTX membrane earns its place and when it does not
Once you have outsole and stack height sorted, waterproofing is the next variable to resolve, and it is where UK runners most commonly over-specify.
Gore-Tex membranes are now standard across flagship trail shoe ranges. The question is not whether GTX technology works. It does. The question is whether it is the right tool for your specific run type, because the same membrane that keeps a cold moorland crossing comfortable can leave your feet sitting in trapped perspiration an hour into a milder outing.
The core trade-off is straightforward. A GTX membrane blocks external water from entering the shoe. It also slows the exit of moisture your foot generates while running. In cold, genuinely wet UK winter conditions, that trade-off often works in your favour: the temperature suppresses sweating enough that the membrane’s waterproofing benefit outweighs the breathability cost. In the mild, damp conditions that characterise much of the UK running calendar, your foot perspires more freely, and the moisture has nowhere to go. After around 90 minutes, the inside of a GTX shoe can feel as wet as an unprotected one.
GTX earns its place in specific scenarios: short runs (under 90 minutes) in cold, wet weather; moorland routes with stream crossings; and for runners who head out infrequently and value dry feet at the finish line over breathability during the run.
Non-GTX trail shoes with a water-resistant upper dry faster, weigh less, and breathe better. For summer trails, longer fell routes, or any run where foot temperature management matters, a non-waterproof shoe with good drainage typically performs better than its GTX equivalent. If moisture management across your whole kit matters on longer efforts, it is worth reading our guide to moisture-wicking running base layers alongside your shoe choice.
One practical note on fit: the GTX membrane adds a measurable layer of structure inside the shoe. If you are comparing a GTX and non-GTX version of the same model, try both where possible, or check whether the brand recommends sizing up.
If you run longer than 90 minutes regularly in cold, wet conditions, the most practical solution is one GTX pair and one non-GTX pair used on different days, rather than committing to waterproof shoes for every outing.
Foot type and terrain: linking your gait to your surface for a narrower shortlist
Most trail shoe guides treat foot type and terrain as separate filters: work through both, then pick a shoe. The problem is that your gait and your surface interact directly. Research confirms that irregular surfaces measurably alter lower-limb mechanics, so a shoe that manages your movement pattern on a smooth road may perform very differently on saturated peat. Combine both variables from the start and the shortlist gets sharper.
If you overpronate and run on boggy, soft ground, the interaction compounds. Inward roll is already a stability challenge; an unstable surface amplifies it with every stride. The spec that addresses both: moderate medial post support, a snug heel counter to resist the suction-pull of soft ground, and a deep-lugged outsole with wide spacing. Addressing only pronation or only terrain leaves half the problem unsolved.
If you run neutral on technical rocky terrain, there is no significant pronation pattern to manage, so the priority shifts entirely to fit precision and rock plate protection. A close-fitting upper with minimal internal movement, a stiff forefoot, and a moderate stack is the target. A shoe that fits loosely may work on flat bridleways but creates real problems on Snowdonia limestone where every footfall demands precision.
If you underpronate (supinate) on chalk or compacted clay, the combination is particularly unforgiving. Supination already reduces natural shock absorption; a firm surface loads that further. A well-cushioned midsole with a softer rubber compound for wet-chalk grip is the specification to shortlist against. For more on matching foot type to shoe construction, the Enter2Run guide to the best running trainers for women covers the foot-type framework in detail.
If you are transitioning from road running and have never had a gait assessment, a brief treadmill analysis at a specialist running retailer is a practical starting point, particularly before buying shoes for technical or boggy ground where instability risk is higher.
One important note: everything in this section is a selection framework, not medical advice. If you experience pain, recurring ankle rolls, or discomfort during or after trail runs, consult a physiotherapist before changing your footwear.
Key construction features to check before buying any trail shoe
Once you have your terrain type and foot-type profile confirmed, run every shortlisted shoe through these six construction checks before committing.
Heel counter rigidity. Press your thumb firmly into the back of the heel cup. It should resist, not flex. On boggy moorland, where peat suction can try to pull the shoe off mid-stride, a soft or collapsible heel counter is a real problem. Pair rigid heel support with a secure lacing system and the shoe stays on your foot regardless of what the surface is trying to do.
Toe protection and rand. The rand is the rubber strip that wraps around the lower edge of the upper. On rocky UK terrain, roots and stones catch the forefoot constantly. A reinforced toe cap handles direct strikes; the rand stops abrasion from peeling the upper away from the sole. If either is absent, remove the model from your shortlist.
Upper durability vs. drainage. Bare mesh drains and dries quickly, which matters after a stream crossing, but gorse and bracken tear through it fast. A hybrid construction, mesh base with reinforced overlays at high-wear zones, handles both demands well. For more on how upper materials interact with cushioning choices, the features to consider for cushioned running shoes guide covers the overlap in useful detail.
Drop. Lower-drop shoes (0 to 4 mm) suit technical terrain where ground-feel aids foot placement. Higher-drop shoes (8 mm and above) will feel familiar if you are arriving from road running. Neither is wrong for UK trails, but moving abruptly from high to low drop loads the Achilles and calf differently, so any transition should be gradual.
Gusseted tongue. A tongue attached to the upper on both sides blocks grit, water, and debris from entering through the top of the shoe. On a two-hour moorland run, it is a small detail with a disproportionately large effect on comfort.
Toe box fit. Allow a thumb’s width between your longest toe and the front of the cap. On downhill gradients, your foot moves forward with each strike. Too short, and repeated toe impact against the cap becomes painful well before the end of a descent.
A seasonal shoe strategy for UK trail runners
Getting the right construction features onto your shortlist is only part of the equation. The other half is timing: the same stretch of trail in the Peak District that demands a deep-lugged mud shoe in February can be bone-dry and rutted by July, and a shoe built for soft ground feels clumsy and unsettled underfoot when the surface hardens.
UK seasons shift trail surfaces more dramatically than most runners expect. Winter and early spring deliver waterlogged peat, claggy clay, and stream crossings that run wider than usual. Maximum lug depth and good mud clearance are essential here. From late spring into summer, those same moorland paths bake into cracked ruts and compacted tracks where deep lugs lose contact between strikes and offer less grip than a shallower, more versatile outsole.
Autumn deserves its own mention because it catches runners out every year. Leaf-covered roots are genuinely treacherous, descents that felt dry and grippy a fortnight earlier turn greasy almost overnight, and lateral stability becomes critical. A sticky rubber compound earns its keep in October and November in a way it simply does not in June.
A two-shoe rotation is the most practical solution for year-round UK trail running. One dedicated winter and mud shoe with deep lugs and a water-resistant upper. One three-season shoe with a mid-depth lug pattern and a breathable mesh upper. That pairing covers the full range of UK surface conditions without compromise at either extreme.
Running both roles from a single model works on mixed bridleway terrain but breaks down at the seasonal extremes. On genuine moorland or bog in winter, a mud-specific outsole makes a measurable difference to both traction and confidence.
Rotation also protects your investment. Shoes used exclusively in wet mud degrade faster than pairs alternated between wet and dry conditions. Two shoes used in rotation across a season will outlast one shoe used for everything.
If budget limits you to one pair, choose the spec that matches your most demanding surface. A soft-ground shoe functions adequately on firm terrain. A firm-ground shoe fails in bog.
How to build your shortlist: a step-by-step framework
With your seasonal strategy in place, you have everything you need to run the framework. Here is how to apply it in sequence.
Step 1: Name your primary terrain honestly. Use the four-category UK classification from earlier in this guide. Not where you plan to run in six months, where you actually ran last month. One dominant surface type is enough to start.
Step 2: Translate that terrain into an outsole spec.
- Boggy moorland: 6 mm or deeper lugs, wide spacing, soft rubber compound
- Chalk and compacted clay: 3 to 5 mm lugs, tighter spacing, sticky compound
- Rocky and technical: moderate lug depth plus a rock plate
- Mixed bridleway: 4 to 5 mm staggered pattern for versatility
This step removes most of the market immediately.
Step 3: Make the waterproofing call. If your typical run exceeds 90 minutes, or you run in mild damp conditions rather than cold wet ones, non-GTX is likely the stronger primary choice. Reserve GTX for shorter cold-weather outings or routes with regular stream crossings. One note on sizing: GTX versions of the same model can fit slightly snugger than standard, so size guidance from the brand is worth checking.
Step 4: Apply your gait profile. Take the candidates still on your list and remove any model that lacks the support structure your foot mechanics need, or the deliberate neutral geometry if that is your profile. Foot type and terrain interact directly, as covered earlier, so this step narrows rather than complicates.
Step 5: Run the construction checklist. Firm heel counter, toe cap and rand, appropriate upper type for your terrain, drop that suits your current training history, gusseted tongue, and sufficient toe box depth. Any model that fails on more than one point comes off the list.
Step 6: Test the fit before committing. At a specialist running retailer, confirm a thumb’s width at the longest toe, no heel lift under load, and firm midfoot lockdown. If you are buying online, verify the return policy before you order, particularly for GTX models.
Follow these six steps and you will finish with two or three models that match your actual routes, not a global ranking built for someone else’s terrain.
Trail shoe selection checklist for UK runners
Use the six steps above to build your shortlist, then run through the items below before you commit to a purchase. Tick each one off in order.
- Primary terrain confirmed. Boggy moorland, chalk and clay, rocky and technical, or mixed bridleway. If you genuinely split your time across two types, choose the wetter or more technical one as your anchor.
- Lug depth and spacing matched to that terrain. Deep lugs (6 mm or more) with wide spacing for soft and boggy ground. Shallow to mid lugs (3 to 5 mm) with tighter spacing for chalk, clay, and compacted paths. Moderate lugs with a rock plate for rocky and technical surfaces.
- Waterproofing decision made. GTX for runs under 90 minutes in cold, wet conditions or where stream crossings are guaranteed. Non-GTX for longer outings, warmer months, or any route where fast-drying and breathability matter more than keeping water out entirely.
- Foot type applied. Confirm whether you need a medial post, a snug supportive heel counter, or a neutral geometry based on your gait profile. Remove any shortlisted model that does not match.
- Construction checklist completed. Work through each of the following before buying:
- Heel counter is firm and resists squeeze
- Toe cap and rand are present
- Upper type suits your primary terrain (hybrid overlays for moorland, mesh for drier technical routes)
- Drop suits your current training background, with no abrupt step down from your road shoes
- Tongue is gusseted on both sides
- Toe box allows a thumb’s width of space at the longest toe
- Seasonal strategy considered. Decide now whether this shoe covers the full year or forms one half of a two-shoe rotation. If you run boggy moorland in winter and dry bridleways in summer, a single shoe will always be a compromise on one end of that range.
- Fit verified. Try the shoe in a specialist running retailer and replicate the checks above on your feet. If you are buying online, confirm the return policy before ordering, particularly for GTX models where the membrane can alter fit relative to the standard version of the same shoe.
The right trail shoe starts with your terrain, not a global ranking
Work through the checklist above and you should have a shortlist sitting in front of you. That list exists because you applied a terrain-first filter, not because a global ranking told you which shoe won on someone else’s trails.
That distinction matters. Lug depth, stack height, and waterproofing are not universal priorities. They are variables tied to your surface, your season, and your foot mechanics. A shoe that dominates on alpine scree or Californian singletrack may be entirely wrong for a saturated November moor in the Peak District or a greasy chalk descent on the South Downs in October. Most global reviews are not testing for those conditions, which is precisely why UK terrain classification has to come first, before brand, before price, and before any “best overall” label.
The six-step shortlist framework and the construction checklist in this guide give you a concrete process to follow. Not “buy a well-reviewed shoe and hope for the best,” but a specific sequence: confirm terrain type, match outsole spec, decide on waterproofing, apply foot type, run the construction checklist, and verify fit before committing.
That process is repeatable. Use it every time a shoe wears out or your routes change.
At Enter2Run, our trail shoe reviews assess each model against a fixed fit-and-mileage protocol across real terrain. Once you have identified your terrain type and built your shortlist using this guide, head to our reviews to compare the specific models that made the cut. The reviews are organised by terrain and foot type, so you are comparing shoes relevant to your running, not someone else’s.
Conclusion
Choosing the right trail shoe for UK running comes down to four things: knowing your terrain type, matching your outsole and stack height to that surface, making an honest call on waterproofing, and factoring in your own foot mechanics. Get those four variables right and brand names and global rankings become secondary.
The framework in this guide is designed to be used repeatedly. Routes change, seasons shift, and shoes wear out. Each time, start with terrain first.
UK trails are specific, and your shoe selection should be too. A saturated moorland path and a dry chalk ridge are not asking the same things of your feet, and no single “best trail shoe” serves both well.
Use your shortlist, run the checklist, then head to the Enter2Run terrain-filtered reviews to find the model that fits your running, not someone else’s.