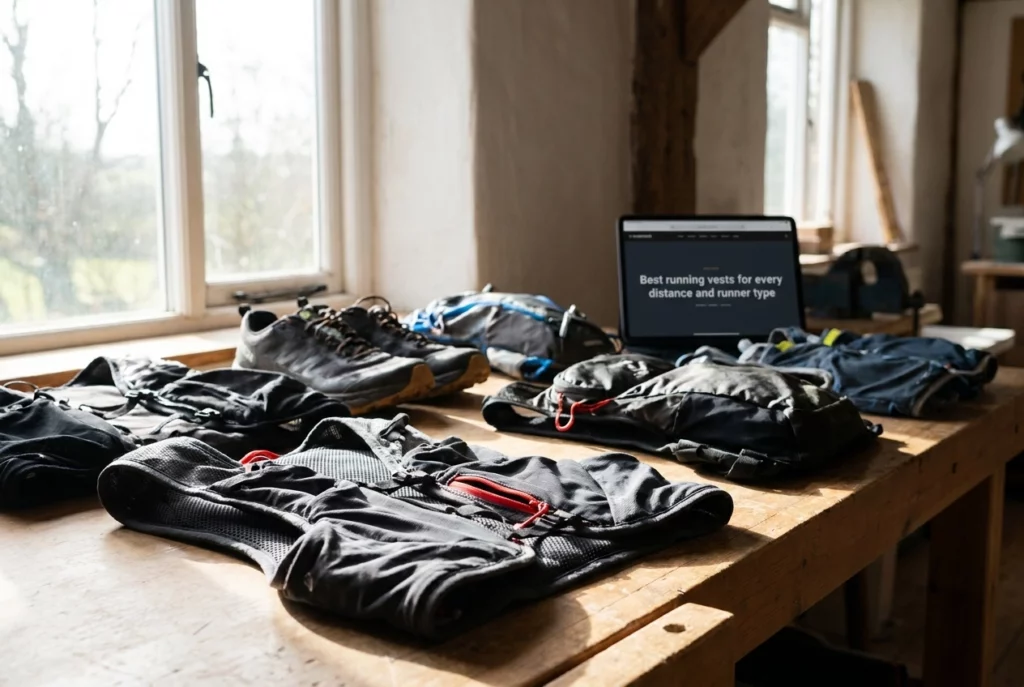
Whether you’re tackling a technical trail, grinding through a marathon, or pushing through a long training run, carrying your essentials without slowing down is a skill every serious runner needs to master. The right running vest can make the difference between a smooth, confident performance and a frustrating, uncomfortable experience that holds you back from your potential.
But with dozens of options flooding the market, choosing the right vest for your specific needs can feel overwhelming. Should you prioritize hydration capacity? Pocket placement? Weight? The answer depends entirely on your distance, terrain, and running style.
In this guide, we’ve done the heavy lifting for you. We’ve researched and evaluated the top running vests across every category, from ultramarathon-ready hydration packs to minimalist race vests built for speed. Whether you’re a trail runner logging serious elevation or a road runner who needs a lightweight carry solution for long runs, there’s a perfect option on this list for you. Read on to find the best running vest that matches your goals, your body, and your next big challenge.
Do you actually need a running vest?
If you search “running vest” right now, nearly every guide you find is written for trail runners or ultramarathoners. That framing makes sense for the gear category, but it leaves road runners, specifically marathon and half-marathon trainers, asking a question nobody is answering directly: do I actually need one of these, or am I about to spend $100-plus on something a $30 belt handles just fine?
The honest answer depends on three variables: distance, conditions, and whether you are training or racing.
Handheld bottles
A handheld is the simplest option and the one with the lowest bounce. A standard soft flask or hard bottle holds roughly 10 to 20 oz, it is easy to refill at water fountains, and it adds almost no body heat. The catch is obvious: one hand is occupied for the entire run. On easy efforts under 8 miles with regular water sources, that trade-off is perfectly acceptable. Push past that distance in summer, add a gel or two to manage, and the single-hand limitation starts to feel like a real constraint.
Waist belts
A belt is hands-free, lighter than a vest, and works well for road runs in the 6 to 14 mile range. Most belts carry one or two small flasks alongside a pocket for your phone, keys, and a couple of gels, which is enough for a standard weekday long run. The fit caveat matters: belts rely on hip circumference to stay in place, and runners with narrower hips often find them riding up toward the waist, which causes bounce and irritation. If that describes you, sizing down or choosing a belt with an adjustable back bungee helps, but it is worth testing before a 13-miler.
Running vests
A vest carries the most, full stop. Capacity typically ranges from 5L to 12L, enough for 1.5 to 2 liters of fluid plus nutrition, a rain layer, a phone, and emergency gear. That is why trail runners and ultra runners prioritize a vest from the first training block; the storage is not optional at those distances or in those conditions. The trade-offs are real, though: a vest adds measurable weight against your torso, traps more heat than a belt on warm days, and will chafe on long efforts if the shoulder straps or chest buckles are not dialed in for your body.
The practical decision table
| Distance and conditions | Best option |
|---|---|
| Under 10 miles, road, aid or fountains available | Handheld or belt |
| 10-plus miles, summer heat, limited water | Vest earns its place |
| 16-plus mile marathon long run, any season | Vest recommended |
| Race day road half or full with aid stations | Belt or nothing; vest optional |
| Trail run with 6-plus mile gaps between aid | Vest preferred |
| Trail ultra or remote mountain route | Vest essential |
The verdict by runner type
If you are training for your first half-marathon on roads with reliable aid stations, start with a belt. It handles your hydration and storage needs without the fit learning curve or added heat of a vest. If you are a marathon trainer logging 16 to 20 mile long runs through summer, a vest is worth the investment: you simply cannot carry enough fluid and nutrition in a belt for that distance in the heat. And if you are already running trails or building toward an ultra, as the trail running community widely confirms, a vest is not a luxury upgrade, it is core kit from day one.
How to choose a running vest: capacity, fit, and hydration format
Choosing the right running vest comes down to three decisions made in the right order: how much you need to carry, which hydration format suits your running style, and whether the vest actually fits your body under load. Work through these in sequence and you will sidestep the most common buying mistakes.
Capacity: match the vest to the run
How you run determines which capacity tier makes sense, and the tiers are fairly well defined across the category.
1 to 3 liters covers runs under 90 minutes where water sources or aid stations are accessible. You are carrying flasks and a few gels, not a day’s worth of kit. 3 to 6 liters suits road long runs and shorter trail days where you need to stash nutrition, a light layer, and enough fluid to bridge gaps between refill points. 6 to 10 liters handles half-day trail runs and mountain races: more food, a safety layer, and the hydration reserve to manage unpredictable conditions. 10 liters and above is the threshold for ultras, multi-day efforts, and any event with a mandatory gear list. At races in the UTMB series and similar mountain events, that list (emergency blanket, rain jacket, first aid kit) sets a hard floor on the capacity you need regardless of personal preference.
A useful starting calculation for hydration alone: plan for roughly 500 ml per 30 to 45 minutes in moderate temperatures, and adjust upward in heat. That number tells you how much dedicated flask volume you need before you account for the rest of your kit.
Soft flask vs. bladder reservoir
Soft flasks collapse as you drink, which eliminates the sloshing that throws off your stride, makes it easy to see at a glance how much fluid remains, and lets you refill in seconds at an aid station without removing the vest. Bladder reservoirs hold more volume in a single unit (typically 1.5 to 3 liters) and keep both chest pockets free for nutrition, but they require a drinking tube and bite valve, and refilling mid-run means taking the vest off and accessing the back compartment. Most vests now ship with soft flasks included and offer bladder compatibility as an optional add-on, a configuration shift that reflects where the market has moved: race-oriented buyers accounted for 38.4 percent of vest sales in 2025, and that audience has largely settled on soft flasks as the race-day standard.
Fit variables that matter most
Getting the fit right before you commit to a vest is the step most buyers skip, and it is where most returns originate. Four variables are worth checking specifically.
Shoulder strap width needs to match your frame. Straps sized too wide will cut into your arm swing within the first mile. Chest strap adjustability and placement matters most for women: straps engineered around a male torso geometry often sit across the chest rather than below it, creating pressure and chafing on long efforts. Women’s-specific sizing (offered by several major vest brands) addresses this more reliably than simply sizing down in a unisex model. Back panel length determines whether the vest rides in place or migrates up toward your neck or down toward your hips as you run, and no amount of sternum strap adjustment fixes a panel that is proportioned for a different torso. Finally, run the bounce test before finalizing any purchase: load the vest with full flasks and do a 30-second heel-strike jog in the store or during a home trial period. If the vest shifts, bounces, or creates a hot spot under that minimal load, it will be worse at mile 15.
Materials and construction signals
Vest construction quality shows up over long miles in ways that are invisible in a store. Lightweight mesh back panels allow airflow to reach the spine and reduce heat accumulation during sustained effort. Stretch-woven front panels conform to the chest without gapping, which is what keeps front flasks from bouncing and chafing. Bonded or flatlock seams remove the raised ridges that cause hot spots and blisters on multi-hour runs. These are not premium-only features, but they do tend to separate mid-range and above options from entry-level vests.
Budget bands
Entry-level vests typically come without soft flasks and use simpler adjustment systems, which is fine for an occasional runner testing whether a vest suits their style. Mid-range vests include soft flasks, better mesh construction, and more front-pocket organization for nutrition. Premium and race vests step up to ultralight fabrics, precise multi-size fit systems, and the capacity to meet mandatory gear requirements at major events. Knowing which band matches your current training volume prevents both overspending and buying a vest you will immediately outgrow.
How we assess running vests at Enter2Run
Every vest featured in this guide is assessed against the same criteria, using manufacturer specifications, independent tests and runner reports. The criteria are the same for every product we cover, so no vest gets an easier ride because of brand recognition or availability.
The evaluation covers four stages. First, initial fit assessment across multiple torso lengths and chest sizes, because vest fit is governed by body geometry far more than a simple S/M/L label suggests. Second, loaded carry performance with flasks filled to capacity on both road and trail surfaces, as runners and independent testers report it, so performance is judged under real running conditions rather than an empty-vest handling impression. Third, bounce and chafe reports across real mileage, targeting the complaints that matter most to runners who wear a vest for hours at a time. Fourth, ease of refilling at speed, because a vest that requires two hands and a full stop to access a flask is not a functional piece of kit on race day.
Enter2Run takes no pay-for-placement and publishes no sponsored reviews. Recommendations are organised by runner type, distance, and use case, not by brand relationship.
Where the evidence on a vest is still thin, we say so directly rather than letting silence imply a full endorsement.
Specific prices are not listed in this guide because retail pricing changes frequently. The budget-band descriptions earlier in this article are the right reference point; check current pricing directly with retailers before you buy.
Best running vest for road marathon training
If you’re deep in a spring or fall marathon training block, running 16 to 22 miles on Sunday mornings, you’ve probably already outgrown your hydration belt. A belt works well up to around 10 or 12 miles, but once your long runs push past that, you need more fluid capacity and more storage than a waist-mounted system can realistically provide. The right vest for this training phase is not a trail pack. It’s a purpose-matched piece of kit designed for pavement, mixed weather, and the specific demands of marathon-distance efforts.
The capacity sweet spot for marathon training miles
For long runs in the 16 to 22 mile range, a 4 to 6 litre vest covers everything you need without making you feel like you’re heading into the mountains. Two front soft-flask pockets give you immediate access to fluid without breaking stride. A pair of 500ml flasks provides one litre up front, which is typically enough to carry you between convenience stops or aid stations you’ve mapped in advance, with your main hydration reserve in the back bladder or a larger rear flask pocket if the vest supports one. Beyond fluid, you want a secure phone pocket (zippered, not elasticated), and enough loose storage for two or three gels and a lightweight layer. If you’re cramming a vest to capacity on a standard long run, it’s either the wrong size or you’re overloading it.
Why road running demands a different vest than trail
Bounce is the issue most road marathoners underestimate when they first try a vest designed for trail use. On soft trail surfaces, the ground absorbs some of the impact energy from each stride. On tarmac or concrete, heel-strike sends that impact directly up through your body, and any vest movement is amplified with every footfall. A trail vest loaded with 10 litres of mandatory race gear and aggressive stabilisation straps solves a different problem entirely. For road use, what you actually need is a snug chest fit that holds the vest flush against your torso before the straps do any work. Road running posture is more upright than trail, so lateral movement and strap migration are less of a concern. The chest fit carries most of the load.
The back panel matters just as much. During tempo runs or on warm-weather long runs, a dense back panel traps heat and turns a manageable effort into an uncomfortable one. Look for a mesh back panel specifically rated or designed for warm-weather road use. This is one area where materials innovation in the current generation of vests has genuinely improved the day-to-day experience for road runners.
What to skip
Avoid vests above 10 litres. These are built for mountain ultras with mandatory gear lists, and every litre of extra capacity you’re not using still adds structure, weight, and bulk. A vest that fits your marathon training block perfectly will feel insufficient on a mountain ultra, and that is the correct outcome. You’re buying for your actual running, not for a hypothetical event.
For a practical starting point on how to match vest features to running use cases, this hydration vest buying guide from Run4Adventure covers the core decisions clearly. For a field-tested look at current options across the capacity range, Treeline Review’s 2026 running hydration vest roundup is a useful reference. At Enter2Run, the vests we rate most useful for road marathon training sit in the mid-range price band, carry 4 to 6 litres, include two front soft flasks in the box, and feature a breathable mesh back panel. That combination handles the conditions your training block will actually throw at you.
Best running vest for trail running and ultras
If you’re preparing for a trail race or ultra, your vest is doing a fundamentally different job than anything a road runner needs. You’re carrying mandatory race kit: an emergency blanket, a first-aid kit, a waterproof layer, plus multiple soft flasks, solid food for hours between aid stations, and potentially a 1.5L or 2L bladder for remote mountain segments. The vest has to hold all of that securely against your body across wildly uneven terrain, in changing weather, over climbs that would put a loaded pack into your lower back if the fit is wrong.
Capacity: matching volume to your race format
The right capacity comes down to how much crew access and aid station frequency your race provides. For most trail races and long mountain days where you’ll hit a checkpoint every 10 to 15 miles, a 6 to 10L vest gives you enough room for mandatory gear, two or three soft flasks, and a reasonable food supply without unnecessary bulk. Step up to 10L or more for ultra events with comprehensive mandatory gear lists, multi-segment runs with no crew access, or races like 100-milers where you may carry a full change of kit. Real-world feedback from ultra runners in the trail community confirms that a 12L vest used across distances from 55 miles to 200 miles is entirely practical, provided the fit and stabilization system hold up under extended load.
Trail-specific construction features that actually matter
A vest built for trail and ultra use looks different from a road vest in several specific ways. Load-lifter straps, the short adjustable straps that run diagonally from the shoulder webbing toward the top of the back panel, pull the vest body upward and inward against your spine on steep climbs, preventing the pack from sagging away from your back as grade increases. Without them, a loaded vest shifts your center of gravity rearward exactly when you need to lean forward into a climb. Trekking pole attachments, either bungee loops at the chest or dedicated side holsters, are standard on trail-specific vests because most technical mountain races permit or require poles on certain segments. You also need weather-resistant zipper pockets on the chest and shoulder straps for electronics, gels, and nutrition you’re accessing every 20 to 30 minutes. The back panel needs to be long enough that a bladder reservoir sits flat against your spine rather than pulling the vest away from your body as you move.
Bounce management under variable load
Trail running surfaces magnify vest movement in ways road running doesn’t. Uneven footing, side slopes, and scrambling sections all create lateral and vertical forces that a road vest’s simpler stabilization system may not absorb. Critically, your vest becomes progressively lighter as you drink, and a vest that sits perfectly at the start of a stage can bounce noticeably two hours in once two soft flasks are empty. Look for compression straps on both sides of the vest body that you can cinch down as flask volume drops, and confirm the chest strap adjustment system allows fine-tuning on the move without requiring you to stop. Runner discussions in active trail communities consistently cite “no bounce” as a deciding factor when choosing between otherwise comparable vests.
What to prioritize when you’re buying
Race vests held 38.4% of all hydration vest product-type share in 2025, which means brands are competing intensely in this segment and the options are genuinely good right now. To cut through the noise, focus on three things. First, modular storage: vests with removable pouches let you reconfigure capacity for a shorter training run versus a race-day mandatory-kit load. Second, flask compatibility: front-pocket flask sizing varies between brands, and a vest is far less functional if you’re forced to use undersized soft flasks or struggle to seat the brand’s own flasks securely. Test with the specific flasks you plan to race with before committing. Third, chest strap geometry: the sternum strap needs to sit below the collarbone and distribute load across the chest without pressing into the sternum on long climbs. This is one of the hardest things to assess from a product page alone, which is why reviewing hydration pack guidance from sources like Runner’s World alongside hands-on testing is worth your time before race day.
Best running vest for women: fit that actually works
Most buyer’s guides give women’s-specific vest construction a single sentence, usually something about narrower straps, before moving on to capacity tables. That brevity misses the real problem. When a running vest causes chafe, rides up at the hem, or leaves you gasping for a full breath on a long climb, the cause is almost never that you picked the wrong size. It’s that the vest was built for a different body.
Torso length is the starting point, not cup size
The most common fit failure for women in unisex or men’s-cut vests comes from back-panel length. Women’s torsos are shorter on average, and a vest engineered around a longer back panel will ride up at the hem during the run, create friction across the lower back, and push any hip belt upward onto the iliac crest rather than sitting on the hip where it can actually transfer load. That last point matters more than most guides acknowledge: a hip belt sitting on the bone rather than below it concentrates pack weight on a single pressure point instead of distributing it across the hip, which compounds fatigue on efforts over two hours.
S, M, and L labels tell you nothing about back-panel length. The correct reference is the manufacturer’s torso chart, measured from the nape of the neck to the top of the iliac crest. Brands that publish those measurements and offer more than one back-panel length earn higher marks in Enter2Run’s fit criteria than those treating “women’s fit” as a label change.
Chest strap and shoulder strap construction
The sternum strap on a properly designed women’s vest sits lower on the chest and the shoulder straps are positioned closer together at the top. That combination keeps the straps off the chest, prevents cross-strap pressure on the sternum, and lets you breathe fully at race pace or on a hard climb. Community discussions in trail running forums make clear this is an active pain point, particularly for women with larger cup sizes, and one that unisex vests with only a strap-width adjustment don’t solve. Narrowing a strap is not the same as repositioning it.
Shoulder strap width is a separate but related issue. Straps under roughly 25mm concentrate load directly on the trapezius, which becomes genuinely uncomfortable beyond 90 minutes. Contoured, padded shoulder straps found on purpose-built women’s designs spread that load across a broader contact area. A vest that achieves “women’s fit” purely by narrowing the strap, without recontouring the shoulder panel or adjusting placement, is a cosmetic change, not a structural one.
How to assess a vest before you buy
Follow this short protocol before committing to any vest:
- Check the torso chart first. If the brand doesn’t publish one, ask before ordering.
- Load the vest to simulate run weight. Fill the flasks or bladder, then jog in place for 30 seconds. Bounce and lateral movement reveal fit problems that standing still conceals.
- Check chest strap range. Slide the sternum strap to its lowest position and confirm it clears your chest without restricting your breathing.
- Assess strap contact. With the vest loaded, check whether the shoulder straps sit flat across the top of the shoulder or dig into the trapezius. Padded, contoured straps should feel stable without pinching.
OutdoorGearLab’s women’s vest testing, which covers 14 tested models, flags comfort and chafe prevention as primary evaluation criteria. The structural reasons behind chafe, however, are rarely spelled out in published reviews. That gap is exactly why fit assessment belongs in your hands before any purchase is final.
Best running vest for beginners: start simple, run longer
If you’re wrapping up your first half-marathon training block and your long runs are pushing into the 10 to 14 mile range in summer heat, a running vest starts making practical sense. The same applies if you’re a new trail runner who has outgrown a waist belt and wants to carry more water, a few gels, and your phone without bouncing gear for the next two hours. This section is written for you, not for someone running a 50K.
The biggest beginner mistake: buying too much vest
The single most common error new vest users make is choosing a 10L or 12L trail vest for distances that simply do not require that much capacity. A large-volume vest loaded with two soft flasks and a few gels weighs noticeably more than a smaller design, and the problem compounds as you drink: an emptying flask in an oversized pocket shifts with each stride, creating bounce and lateral movement that a correctly sized vest eliminates entirely. For road long runs in the 10 to 14 mile range, a 3 to 5 liter vest carries everything you need and stays locked against your torso. Running vest community discussions consistently show experienced runners steering beginners toward lighter, lower-volume options for sub-half-marathon distances, and that advice holds here.
Chafe prevention before your first long run
New vest users underestimate friction. The three zones that cause the most trouble are the inner upper arm where the vest side panel contacts your arm swing, the back of the neck where a high collar rubs on humid skin, and the lower chest where the sternum strap crosses. The fix is straightforward: wear a moisture-wicking base layer for your first two or three vest runs to reduce direct vest-on-skin contact, and apply an anti-chafe balm to every contact point before you head out. Critically, run with both flasks fully loaded on those early test runs. Simulating race weight reveals exactly where friction builds before it matters on a key training day. The Running Vest Tips and Hacks video covers several of these prevention strategies and is worth ten minutes of your time before your first run in a new vest.
Soft flask basics that most guides skip
Overfilling a soft flask is a guaranteed way to end up with electrolyte drink down your chest by mile two. Fill each flask to the shoulder of the flask, not the brim, which leaves enough air space that running vibration will not unseat the cap. If your flask is producing no flow on a first run, check the bite valve lock ring before assuming the vest is defective. The lock ring is a small collar that sits just behind the bite tip; when engaged, it pinches the valve closed entirely. Rotate it to the open position, pull the bite tip firmly, and the flask will flow correctly. Two flasks also gives you the option of carrying water in one and electrolytes in the other, which is useful on long summer runs.
Beginner vest checklist
Before you buy, confirm a vest has all five of these features:
- Two front flask pockets that hold flasks without hand support at any load level
- At least one zippered chest pocket large enough for a phone and an ID card
- Adjustable sternum strap that lets you dial out bounce independently of shoulder fit
- Back panel that ends at least two inches above your waistband, so the lower edge does not restrict hip movement or create friction against shorts
- A breathable mesh back panel, particularly important for summer running where a solid fabric back panel traps heat against your spine
On budget, entry-to-mid-range vests in the 3 to 5L range give beginners the best combination of simplicity, fit adjustability, and reasonable weight. Premium race vests offer performance advantages that become meaningful once you know your fit preferences across several vest runs. Buy for the training block you are in now, and upgrade when you understand what you actually want to change.
Best lightweight race vest for fast-finish runners
This section is written for the runner who has already done their first few trail races and is now thinking about racing leaner. You know where the aid stations are, you’ve practiced your flask exchange, and you want the vest to disappear on your body so you can focus entirely on pace and terrain.
What separates a true race vest from everything else is a short list of non-negotiable specifications. Empty pack weight should sit below 150g, and the best purpose-built race vests in the current market push closer to 90 to 110g. The back panel should be open mesh or ultra-thin single-layer fabric, not a structured foam-padded system. Front storage should be shaped specifically for two 500ml soft flasks and a row of gels, not a generalist pocket that tries to double as a training daypack. The fit system needs to lock the vest against your torso without any secondary adjustment required mid-race, and it must hold that lockdown even when your flasks are nearly empty in the final miles.
That last point is more important than most runners realize before they’ve raced in an ultralight vest. A vest that feels locked and stable at the start, with 1L of fluid and a full pocket of gels, can develop noticeable bounce by mile 18 when you’re carrying 200ml and two empty gel wrappers. At Enter2Run, we look at how race vests behave at both fully loaded and near-empty load specifically because of this, using independent tests and runner reports from the late miles of long efforts. Bounce behavior at low load is a design characteristic, not a fluke, and it tells you more about a vest’s fit architecture than any static trail test.
Ultralight construction carries real trade-offs you should understand before buying. Fabrics thin enough to hit sub-100g pack weights abrade faster against rocky terrain and sharp pack contents. Stitching reinforcement at high-stress points, the shoulder junction, the flask pocket seams, the sternum buckle anchors, matters far more on a 95g vest than on a 200g training vest because there is less structural redundancy in the system. A race vest is engineered for race loads only. Packing it with a full day’s kit, extra layers, trekking poles, and a 2L bladder, will stress seams and buckle points that were never designed for that weight. Use it for racing. Use a different vest for training days with heavy carry requirements.
For capacity, 3 to 6L covers the practical requirements of most 50K and shorter trail races with regular aid station support. A 4 to 5L vest fits two 500ml flasks, a phone, eight to ten gels, and a compressible emergency layer without being overpacked. Runners entering races with mandatory gear lists that include a full waterproof jacket, emergency bivvy, headtorch, and whistle will likely need to step up to a 6 to 8L design regardless of personal preference for minimal carry. Check your race’s mandatory kit list before committing to a vest size.
In 2026, the primary differentiators across the race vest segment are lightweight mesh construction, breathable ripstop fabrics, and ergonomic body-mapping in the cut. When you’re evaluating options, check whether the fabric spec is listed as trail-rated or whether the product page uses road-race and short-course language. That distinction tells you a great deal about where the vest was designed to be used and how long the materials will hold up in technical terrain.
Running vest fit checklist: a repeatable process before every purchase
Getting the right fit on a running vest is a process, not a guess. Work through these six steps in order, and you’ll avoid the most common sizing mistakes before you commit to a purchase.
Step 1: Measure your torso length before consulting any size chart
Before you open a brand’s size guide, grab a flexible tape measure. Measure from the base of your neck (the prominent vertebra where your neck meets your shoulders) down to the top of your hip bone. That torso length number is your primary sizing input for most vest brands, and it is a more reliable starting point than chest circumference alone. Shirt size is not a useful reference here. A runner who wears a medium in a technical tee may need a small or a large in a vest depending on how their torso is proportioned. Check the specific brand’s chart with your actual measurement in hand, not a label from your closet.
Step 2: Load the vest before you try it on
An empty vest will always feel better than a loaded one. Before any fit assessment means anything, fill both front flasks to 500ml, pack in a representative amount of nutrition (figure roughly 400 calories for a long run), add your phone, and tuck in a light emergency layer if your runs require one. That loaded configuration changes how the vest sits on your torso, how the straps tension, and where pressure points appear. Fit a vest loaded exactly as you intend to run with it.
Step 3: The bounce test
With the vest fully loaded, jog in place for about 30 seconds. The vest should move with your shoulders as a single unit. If it bounces independently, or if the hem rises above your lower back during the movement, the torso length is likely too short, or the shoulder and sternum straps need tightening. Address strap adjustment first; if the hem still rises after tightening, move to the next size up.
Step 4: The breath test
Fasten the sternum strap and take a full, deliberate deep breath. Your chest should expand without restriction. If the strap limits your inhalation, loosen it by one adjustment increment and test again. The sternum strap’s job is to stabilize the shoulder straps laterally; it should not act as a compression band across your ribcage. This matters most during hard efforts when your breathing rate climbs.
Step 5: The reach test
Extend both arms directly forward, then overhead. The shoulder straps should stay clear of your armpits throughout that range of motion, and the back panel should remain in contact with your spine. If the back panel lifts away on the overhead reach, the vest is too short in the torso. Armpit chafing on a 20-mile run almost always traces back to a strap that digs into the armpit during arm drive, something the reach test surfaces before you’ve opened any packaging.
Step 6: Run a 10-minute loaded test before committing
Most running specialty retailers will let you jog around the store or parking lot with a fully loaded vest before purchase. If you’re buying online, check the return policy before you order, run with the vest on a treadmill at your normal training pace, and leave every tag attached until you are certain the fit holds. Ten minutes of actual running will reveal fit problems that five minutes of standing in a store never will.
Caring for your running vest: cleaning, flasks, and longevity
Your vest will last significantly longer if you give it the same attention after a run that you give your shoes. Here is a straightforward maintenance routine organized by component.
Washing the vest
Hand washing is the correct method for every running vest, regardless of price or brand. Machine washing degrades the fine mesh panels that make modern vests breathable, stresses bonded seams that are not designed to handle agitation cycles, and can permanently deform the shaped soft flask pockets at the front. Fill a basin with cool water, add a small amount of mild, unscented detergent, and work the fabric gently by hand. Avoid bleach and heavily scented soaps, both of which can degrade the TPU materials used in flask pockets and reservoir compartments. Rinse thoroughly, then hang the vest to air dry away from direct sunlight. UV exposure fades fabric and weakens mesh fibers over repeated drying cycles.
Soft flask and bite valve care
Rinse your soft flasks with clean water after every run. When you have been running with a sports drink or electrolyte mix, rinse immediately after you finish and stand the flask upside down over a bottle rack with the cap fully removed to allow air circulation inside. Soft flasks collapse during use, which traps residual moisture against interior surfaces and promotes mold far faster than a rigid bottle would. Do not use boiling or near-boiling water to clean TPU flasks. A safe warm rinse is sufficient for routine cleaning. Bite valves need separate attention because they accumulate bacteria more readily than any other part of the hydration system. Remove the valve after each run, rinse it individually, and replace it every three to six months of regular use, even when it looks and feels fine.
Bladder reservoirs and vest replacement
If your vest uses a bladder reservoir, scrub the interior with a long-handled brush after each use and hang it open to dry completely before storing it. A diluted white vinegar rinse or a cleaning tablet removes odor and buildup between deeper cleans. For the vest itself, watch for thinning or holed mesh panels, buckle clips that no longer lock firmly, delaminating seams along the shoulder straps, and soft flasks that have lost their shape and no longer seat correctly in the front pockets. Any of these signals means the vest is no longer performing as designed. A well-maintained mid-range vest, cleaned consistently and stored dry, should deliver two to four years of regular long-run use before those signs appear.
Choosing the right vest for where you are right now
The rule here is straightforward: buy for the running you are doing now, not the running you imagine doing next year. Match capacity to your longest current distance and the conditions you actually run in. That single principle will serve you better than any spec comparison.
Road marathon trainers are well covered by a 3 to 6L vest carrying two front-mounted soft flasks. That setup handles the hydration demands of a 20-mile long run without the reinforced structure and extended storage that trail-specific designs add for good reason on technical terrain. Overbuilding for a use case you don’t have means carrying extra weight and complexity you don’t need.
Trail and ultra runners should weight fit and storage modularity above pack weight. A vest that sits cleanly against your torso through a six-hour mountain run will outperform a lighter option that shifts, bounces, or chafes by mile three. Twenty grams is irrelevant. A hot spot at the collarbone is not.
Beginners should start with the simplest vest that covers their current longest distance, then upgrade once they know what they actually want from the gear.
Run the fit checklist in the section above before every purchase. Fit failure is the most common reason a vest ends up on a shelf within the first month, regardless of price point. As new models are assessed against Enter2Run’s fit-and-mileage criteria, updated assessments are published in the gear reviews section.
Conclusion
Finding the right running vest comes down to three things: knowing your distance, understanding your terrain, and being honest about what you actually need to carry. A minimalist race vest works beautifully for a fast road marathon but will fall short on a 50-mile trail adventure. Fit and comfort matter just as much as capacity, because the best vest in the world is useless if it bounces, chafes, or slows you down.
Use the recommendations in this guide as your starting point. Narrow your choices by distance first, then refine by terrain and personal preferences like pocket placement and hydration system type.
The right vest will stop feeling like gear and start feeling like part of your stride. Pick the one that fits your running life, lace up, and get out there. Your best run is waiting.