You laced up your shoes, hit the pavement with enthusiasm, and then it happened. A nagging, persistent ache around your kneecap that makes every step feel like a battle. If this sounds familiar, you are likely dealing with runner knee, one of the most common injuries that sidelines beginners before they ever reach their full potential.
The good news is that runner knee is well understood, manageable, and in most cases, fully recoverable with the right approach. You do not have to give up running permanently or spend months on the couch wondering if you will ever get back to training.
In this guide, you will learn exactly what runner knee is and what causes it, why beginners are particularly vulnerable to this frustrating condition, and the practical, step-by-step strategies you can use to recover and return to running safely. Whether you are dealing with this injury right now or simply want to protect yourself going forward, this tutorial will give you the clear, actionable information you need to keep moving forward with confidence.
What is runner’s knee?
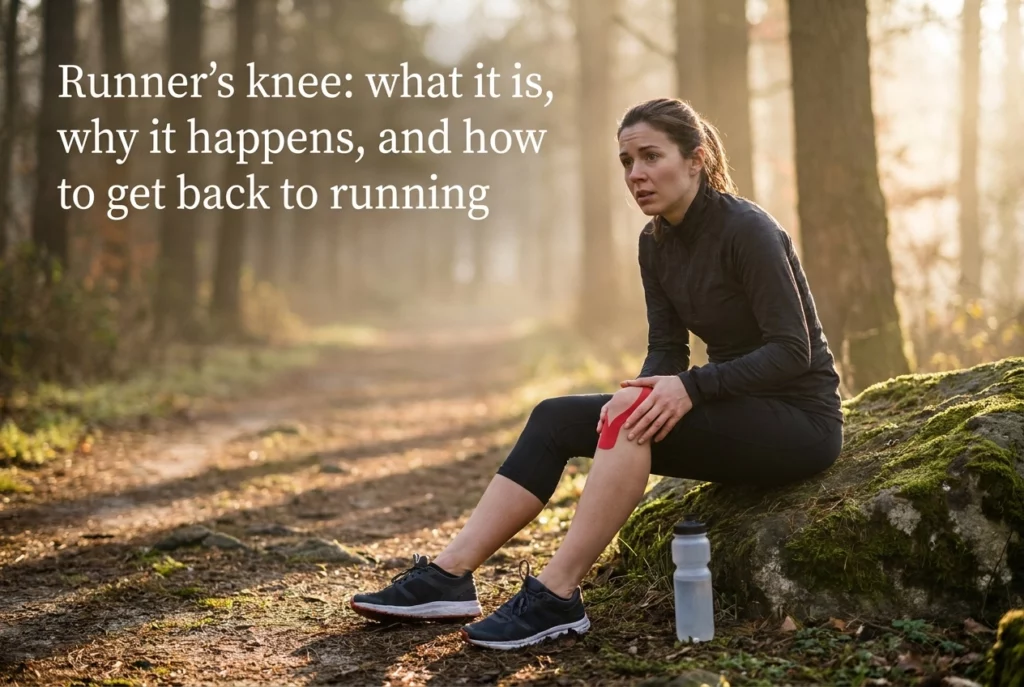
Patellofemoral pain syndrome, or PFPS, is the medical name for what most runners call “runner’s knee.” In plain terms, it describes pain at the front of the knee or around the kneecap (patella) at the point where the kneecap meets the lower end of the thighbone (femur). The discomfort is typically a dull, diffuse ache rather than a sharp, pinpoint pain, and it tends to be felt directly behind or around the edges of the kneecap. According to Johns Hopkins Medicine, symptoms can also include a rubbing, grinding, or clicking sensation when you bend and straighten the knee.
It is worth being clear about one common misconception: “runner’s knee” refers to PFPS specifically, not to every type of knee pain that develops during training. Other knee injuries, including iliotibial band friction syndrome (ITBFS) and patellar tendinopathy, are separate conditions with their own causes and presentations. A peer-reviewed review published via PMC identifies PFPS, ITBFS, and patellar tendinopathy as three of the most frequently encountered knee injuries in the running population, and lumping them together under one label can lead you in the wrong direction when you are trying to figure out what is going on.
PFPS pain tends to follow a recognizable pattern. It often comes on during longer runs, when the quad muscles fatigue and lose their ability to keep the kneecap tracking smoothly. You may also notice it after sitting for a long stretch with your knees bent, a symptom clinicians sometimes call the “movie sign.” Stairs, squatting, and running downhill are other common triggers, as these movements increase the compressive load on the patellofemoral joint.
This article is general information only. If your knee pain is sharp, persistent, worsening, or accompanied by swelling or instability, please see a physician or physiotherapist for a proper assessment. As the Cleveland Clinic notes, PFPS symptoms can resemble those of other knee conditions, and an accurate diagnosis is the essential first step before any treatment or training adjustment.
How to tell which knee injury you are dealing with
Not every sore knee is the same injury, and treating the wrong condition will not get you back on the road any faster. Three conditions account for the majority of running-related knee pain, and each one has a distinct signature across three dimensions: where it hurts, when it hurts, and what makes it worse.
Patellofemoral pain syndrome (PFPS)
PFPS produces a diffuse, achy pain at the front of the knee or spread around the kneecap itself. It rarely arrives at kilometre one. Instead, it tends to build gradually as your run lengthens and your quad muscles begin to fatigue, which is why beginners often notice it appearing right around the time their training distances start to climb. Two activity triggers stand out: stairs (particularly descending) and prolonged sitting with the knees bent. That second one is sometimes called the “movie sign,” because the ache that builds while you sit in a cinema seat is a recognised hallmark of PFPS. Rest usually quiets it down, but the pain returns as soon as loading resumes.
IT band friction syndrome (ITBFS)
ITBFS feels sharp and lateral, meaning it sits on the outer side of the knee rather than at the front. The most telling feature is its timing: it tends to strike at a predictable point in a run, often somewhere around the 20 to 30 minute mark, almost like a switch being flipped. At rest, the pain largely disappears, and stairs rarely bother you. That absence of pain off the run is one of the clearest ways to separate ITBFS from PFPS.
Patellar tendinopathy
Patellar tendinopathy sits lower than PFPS, localised at the patellar tendon just below the kneecap rather than around it. A common pattern is pain that is worst in the first few minutes of a run, eases once the tissue warms up, then returns after you stop. Loading activities outside of running, such as jumping or deep squatting, also provoke it. In chronic cases the pain can become constant rather than intermittent, which is a signal to seek assessment sooner rather than later.
When the symptoms overlap
These three conditions do not always present in textbook fashion, and it is genuinely possible to have features of more than one at the same time. Runner’s knee is one of the most common injuries runners face, but the symptom patterns that distinguish it from its neighbours are subtle enough that self-diagnosis has real limits. If you are uncertain which condition you are dealing with, a sports physiotherapist can perform a hands-on assessment and point you in the right direction. Where structural causes need ruling out, imaging including X-ray is an option. Symptoms such as the knee giving way or locking are not typical of any of the three conditions above and should always prompt professional review to exclude cartilage or ligament injury.
Why runner’s knee happens: the mechanics behind the pain
To understand why your knee started protesting on that last long run, it helps to know what the kneecap is actually doing every time your foot strikes the ground. The patella sits in a shallow groove at the lower end of the femur, called the trochlear groove, and its entire job is to glide smoothly up and down within that channel as your knee bends and straightens. Think of it like a cable running over a pulley: when everything is aligned, the motion is efficient and painless. When the cable drifts to one side, friction builds fast. That lateral drift is exactly what happens in PFPS. The kneecap tracks off-center, contact pressure concentrates on one edge of the joint rather than spreading evenly, and the cartilage underneath starts absorbing stress it was never designed to handle. The longer that imbalance persists, the louder your knee gets about it.
The four forces pulling your kneecap out of position
Four mechanical drivers account for most cases, and they rarely travel alone.
Weak quadriceps sit at the top of the list. The quads are the primary stabilisers of the patella, and when they fatigue or are chronically underdeveloped, they lose the ability to center the kneecap in its groove. For a beginner, this often shows up during the back half of a longer run, when the quads are tiring and patellar control quietly deteriorates. Skipping strength sessions is the most direct route here: if you are only running and never loading the quads in the gym or at home, you are building mileage on a shaky foundation.
Hip and glute weakness compounds the problem from above. Weak glutes allow the femur to rotate inward with each step, pulling the entire knee into a valgus (knock-kneed) position. That inward rotation shifts the kneecap laterally relative to its groove, increasing the contact pressure that causes pain. Runners who jump their weekly mileage quickly tend to expose this weakness before the supporting muscles have had time to adapt, per the NCBI overview of patellofemoral pain syndrome.
Tight hamstrings and a tight Achilles tendon drive load upward through the kinetic chain and increase the compressive forces at the patellofemoral joint. If you have been ignoring a nagging tightness at the back of your leg, or skipping the cool-down stretch because you feel fine in the moment, that accumulated tension is quietly raising the pressure every time you bend your knee.
Overpronation, the inward rolling of the foot on landing, rotates the lower leg inward and adds a further lateral pull on the kneecap. Running in worn-out shoes whose midsoles have compressed flat, or in shoes that do not match your foot mechanics, removes the structural support that buffers this rotation. A shoe that has logged several hundred miles may look fine on the outside while offering very little underfoot, making it a silent contributor to patellar tracking problems.
Why women develop PFPS more often
Research published in the International Journal of Sports Physical Therapy confirms that PFPS is more prevalent among women than men, and the anatomy explains a significant part of why. Women on average have a wider pelvis relative to femur length, which creates a larger Q-angle: the angle formed between the line of pull of the quadriceps and the line of the patellar tendon. A wider Q-angle increases the lateral force on the kneecap during every step, meaning the patella is already working against a greater mechanical disadvantage before training load or muscle weakness enter the picture. This is not a reason to train differently from the outset, but it is worth understanding if you are a female beginner who develops knee pain earlier than expected.
Everything described here is a mechanical framework to help you make sense of what you are feeling. Which specific factor is most relevant to your knee is something a physiotherapist or sports medicine clinician can assess properly, working from your movement patterns, strength, and foot mechanics rather than a general explanation. If you are experiencing persistent pain, that assessment is the right next step before adding mileage or attempting any self-directed fix.
Training load and when runner’s knee tends to appear
Knowing that runner’s knee is a load management problem is useful. Knowing exactly when that load becomes dangerous in your specific training plan is what actually keeps you healthy.
In a couch-to-5K structure, weeks four through six are the first real risk window. That is when the plan transitions from short run-walk intervals to sustained running blocks, and the cumulative stress on the kneecap begins to compound. In a beginner marathon plan, the steeper danger zone runs from roughly weeks six through ten, when weekly mileage climbs most aggressively and quad fatigue starts to outpace the muscle’s ability to stabilize the patella on every stride. If you are following either of those structures, those are the weeks to watch your body most carefully. Enter2Run’s couch-to-5K plan and beginner marathon training plan are built around controlled ramps precisely to move you through those windows without unnecessary spike loading.
The 10 percent rule gives you a concrete ceiling to work with. If your current long run is 6 miles, the maximum safe addition the following week is 0.6 miles, bringing you to 6.6. That feels almost trivially small, but it reflects the pace at which cartilage, tendons, and supporting musculature actually adapt to new load. Exceeding that threshold repeatedly is how overuse injuries, including PFPS, quietly accumulate over several weeks before announcing themselves as pain.
That gradual accumulation is exactly the point. PFPS rarely develops from a single run; it develops when training volume increases faster than the quads, VMO, and glutes can strengthen to meet it. By the time your knee hurts on an easy run, the stress has usually been building for two or three weeks already.
The returning runner faces a specific version of this trap. After a break of several weeks or more, cardiovascular fitness fades more slowly than structural conditioning does. Your lungs and heart may tell you that an eight-mile run feels completely manageable, while your quad muscles and hip stabilizers are genuinely not ready to protect your kneecap through that distance. That mismatch, feeling aerobically capable but being structurally underprepared, is one of the most reliable setups for PFPS onset in runners resuming training. Treat your return like week one of a fresh plan, regardless of where you left off.
Choosing a running shoe that supports kneecap health
Your shoe choice is not a cure for runner’s knee, but it is one of the most controllable variables in the equation. Understanding why certain features matter will help you make a smarter decision at the shoe wall rather than just grabbing whatever feels cushioned.
How foot mechanics travel up to your kneecap
When your foot rolls inward excessively on landing (overpronation), it triggers a chain reaction up the leg. The tibia rotates inward with it, and that rotational force pulls the kneecap sideways, out of the shallow groove it is meant to track through. Hopkins Medicine identifies this exact pattern as a recognized mechanical cause of PFPS: the foot rolling in while the thigh muscles pull the kneecap outward creates the misalignment that produces anterior knee pain. A stability shoe with a medial post, a denser foam wedge along the inner midsole, resists that inward roll at the source. It does not eliminate the problem on its own, but it reduces the rotational force before it reaches the knee. Not every overpronator develops runner’s knee, so your foot type is one data point, not a diagnosis.
Why heel-toe drop matters more than most beginners realize
Drop is the height difference between the heel and forefoot of a shoe, measured in millimeters. If your hamstrings or Achilles tendon are tight (a common finding in beginners who spend most of the day sitting), a sudden switch to a zero-drop or very low-drop shoe forces those shortened structures to work through a greater range of motion than they are ready for. That increased demand loads the patellofemoral joint from below as well as above. A moderate drop in the 8 to 10 mm range acts as a buffer while you build posterior chain flexibility through consistent stretching. If you are currently running in higher-drop shoes and want to move lower over time, do it gradually across several months, not in a single shoe swap.
Cushioning degrades before the shoe looks worn out
Midsole foam attenuates the impact force of each foot strike before it travels up the kinetic chain to your knee. Once that foam compresses and loses its responsiveness, impact forces rise, even if the upper still looks clean and the outsole rubber is intact. Tracking your mileage per pair is a practical habit that pays off here. Rotating between two pairs also allows each shoe’s foam to decompress between sessions, extending effective life and keeping impact attenuation consistent across your training week. According to OrthoNJ’s practical guide for runners, proper footwear is a concrete, modifiable variable in runner’s knee prevention, not a secondary consideration.
No shoe category removes all risk
The right shoe for your foot mechanics reduces one set of stressors on the kneecap. It does not compensate for weak glutes, a rapid mileage jump, or a collapsing hip on landing. Footwear works alongside strength, load management, and running form, not instead of them. The best starting point is identifying your foot type and the terrain you primarily run on, then matching those factors to the appropriate shoe category. Enter2Run’s shoe guides, organized by foot type and terrain, walk you through exactly that process with specific category recommendations for road and trail running.
A practical strength routine to keep runner’s knee at bay
This routine is designed as a general conditioning resource for healthy runners who want to reduce their risk of developing patellofemoral pain. It is not a rehabilitation protocol. If you are already experiencing active knee pain, please see a physiotherapist or sports medicine physician before starting or modifying any exercise programme. A professional can assess what is actually happening at your kneecap and give you guidance tailored to your situation.
For everyone else, two to three sessions per week, with at least one rest day between sessions, is the right starting point. Expect four to six weeks of consistent work before the strength gains begin to translate into noticeable changes on the road. That timeline can feel slow when you are eager to just run more, but that is how muscle adaptation works. Stick with it.
Start each session with a five-minute dynamic warm-up: leg swings, hip circles, and a few bodyweight lunges are enough to prepare your joints and activate the muscles you are about to train.
Clamshells: 3 sets of 15 reps each side
Lie on your side with your hips stacked, knees bent to roughly 45 degrees, and feet together. Keeping your pelvis completely still, raise your top knee toward the ceiling, then lower it with control. That is one rep. The target here is the gluteus medius, the hip abductor that prevents your pelvis from dropping on the stance leg during every running stride. When this muscle is weak, your femur rotates inward and the kneecap is pulled off its tracking groove. A resistance band looped just above the knees will increase the challenge once 15 reps feel easy.
Bodyweight squats or goblet squats: 3 sets of 12 reps
Stand with feet roughly hip-width apart. As you lower into the squat, focus on driving your knees out so they track directly over your second toe. That single cue does most of the alignment work. Squats build quadriceps and glute strength simultaneously, which matters because both muscle groups contribute to kneecap stability under load. Once the bodyweight version feels straightforward, hold a single dumbbell or kettlebell at your chest for the goblet variation.
Eccentric step-downs: 3 sets of 10 reps each leg
Stand on a low step, roughly 10 to 15 centimetres high, on one leg. Slowly lower your opposite heel toward the floor over a count of three, then return to the start. The emphasis is entirely on the descent, which trains the quad eccentrically. That eccentric control is exactly what your quadriceps need during the loading phase of each running stride. Keep the movement slow and deliberate; speed defeats the purpose here.
Hip bridges: 3 sets of 15 reps
Lie on your back with knees bent and feet flat on the floor. Drive through your heels to lift your hips until your body forms a straight line from shoulders to knees, then lower with control. Hip bridges target the glutes and hamstrings while placing almost no compressive demand on the knee joint itself. That low-load profile is why this exercise appears in many physio-guided early-stage programmes, though if you have any existing knee discomfort, get physio clearance before including it.
Straight-leg raises: 3 sets of 12 reps each leg
Lie on your back with one leg bent and one leg straight. Tighten the quad of the straight leg, then raise it to the height of the opposite knee. Lower slowly. Because the knee stays fully extended throughout, there is no compressive force on the joint, making this a reliable way to build VMO (vastus medialis oblique) activation when knee loading needs to be limited. The VMO is the teardrop-shaped muscle at the inner lower quad that plays a direct role in pulling the kneecap medially and keeping it centred in its groove.
For a deeper look at how to prevent runner’s knee with expert input from orthopedic specialists, the HSS resource is worth bookmarking alongside this routine. And if you want a detailed visual walkthrough of the movements, this exercise guide for recovery and prevention from Barbour Orthopaedics covers technique cues in useful depth.
During any of these exercises, if pain rises above a 3 out of 10, stop and rest. This routine is built to protect your knee, not stress it further.
Returning to running after runner’s knee: a phased approach
The most important thing to understand before you attempt a single step of running is this: your return timeline is governed by your symptoms, not by a date on the calendar. Two runners with the same diagnosis can have completely different recovery arcs depending on how long the injury was ignored, how much strength work they were doing before it appeared, and how their body responds to load. A physiotherapist can give you an individualised assessment that no general framework, including this one, can replicate. If you have been managing pain for more than a few days, or if you have not already spoken to a clinician, that appointment should happen before you move through any phase below.
Phase one: pain-free daily movement
Before running re-enters the picture, you need a baseline of functional, pain-free movement in everyday life. That means walking a full block, climbing and descending a flight of stairs, and doing a light bodyweight squat, all without anterior knee pain. These are not warm-up tests. They are entry criteria for phase two, and you should not move on until you can check every box without discomfort. Continue the hip and quad strengthening work from the prevention routine described earlier in this guide, scaled to whatever load your knee tolerates. Complete rest is not the goal here; load management is. This phase lasts as long as it needs to, whether that is five days or five weeks.
Phase two: structured walk-run intervals
Once daily movement is genuinely pain-free, you are ready to reintroduce running in small, controlled doses. Start on flat terrain only, since downhills in particular increase compressive force on the kneecap and have no place in an early return. A sensible starting framework is one minute of easy running followed by two minutes of walking, repeated for a total of 20 minutes. The rule for progression is straightforward: if a session produces any pain during the run intervals or within 24 hours of finishing, you repeat that session rather than advancing. Only a pain-free response, during and afterward, earns you the next step. The later-phase return-to-run framework from The Prehab Guys reinforces this logic, noting that return-to-running should follow, not replace, foundational strength and load-tolerance work.
Phase three: rebuilding continuous running
When you can complete 20 to 25 minutes of continuous running with no pain response during the run or in the 24 hours that follow, you are ready to rejoin a structured training plan. Re-enter at a weekly mileage that sits well below the level where your symptoms first appeared, and apply the 10 percent weekly increase rule from that starting point, increasing total volume by no more than 10 percent each week. Avoid hills and speed work until you have built several weeks of pain-free flat running. Continue strength training alongside your runs, not just during the off period.
Red flags that should pause your progress immediately
At any phase, certain signals mean you stop and seek professional input before continuing:
- Sharp or worsening pain during activity
- Swelling around or beneath the kneecap
- Pain that persists beyond 24 hours after a session
- Any new symptom that was not present before
Any of these warrant a physio or physician appointment before you run again. This framework is general information for healthy adults navigating a return to running. It is not medical advice, and it does not replace a clinical assessment tailored to your knee, your history, and your goals.
Runner’s knee prevention: a quick-reference checklist
Everything covered in the previous sections of this guide points to one conclusion: runner’s knee is largely preventable, and prevention is a daily practice rather than a single decision. Print this list, save it to your phone, or pin it somewhere you will actually see it before you head out the door.
- Apply the 10 percent rule. Never increase your weekly long run or total mileage by more than 10 percent from one week to the next. This widely used coaching heuristic puts a number on the “gradual increase” principle that Johns Hopkins Medicine and most sports medicine clinicians recommend. Your knee needs time to adapt to new load; the calendar does not care how motivated you feel.
- Strength train twice a week. Prioritise quads, glutes, and hip abductors using the routine covered earlier in this guide. NIH research confirms that regularly strengthening thigh and hip muscles is the best-supported way to reduce PFPS risk. You do not need a gym to do this work.
- Check your shoes every 300 to 500 miles. Midsole compression is invisible from the outside; a shoe can look fresh while delivering almost no cushioning. If your shoes feel flat or your knees are starting to speak up, treat it as a rotation or replacement signal.
- Match your shoe category to your foot mechanics. If you overpronate, a stability or motion-control shoe reduces the inward rotation that pulls your kneecap off its tracking groove. Hopkins Medicine identifies this exact movement pattern as a direct mechanical cause of PFPS.
- Warm up before every run. Five minutes of dynamic movement, including leg swings, hip circles, and walking lunges, prepares the patellofemoral joint for load more effectively than static stretching held before activity. Save the longer static holds for after your run.
- Run with a slight forward lean and avoid overstriding. Landing with your foot close to your centre of mass reduces the braking forces that compress the kneecap against the femur. Hopkins Medicine specifically recommends running with a forward lean and bent knees as a prevention strategy.
- Address tightness after every run. Tight hamstrings and a tight Achilles tendon are listed by Hopkins as direct contributing causes of PFPS. Regular stretching of both after your runs reduces the posterior chain tension that increases stress on the patellofemoral joint over time.
For a practical look at the exercises that support several of these checklist points, Princeton Orthopaedic Associates’ runner’s knee prevention and treatment overview is a useful clinical reference. If you want a visual walk-through of the movement patterns involved, the runner’s knee rehab exercise video from Rehab Science provides clear demonstrations for each exercise.
None of these items requires a significant time commitment. Together, they represent the controllable variables that sit between a healthy training block and a frustrating layoff.
When to see a physio or physician
Self-management strategies can take you a long way with runner’s knee, but they have limits. Book an appointment with a physio or physician if any of the following apply: pain persists for more than two weeks despite genuine rest and a meaningful reduction in training load; the pain is sharp or severe rather than the familiar dull ache around the kneecap; the knee swells visibly; you notice locking, catching, or giving-way sensations; or the discomfort is disrupting your sleep or making ordinary tasks like descending stairs difficult. These patterns suggest something beyond a straightforward load spike, and continuing to run through them risks turning a manageable problem into a longer setback.
A clinical assessment is not complicated. Your provider will take a health history, perform a physical examination, and may order X-rays to rule out structural pathology such as a stress fracture or early arthritis. Diagnosis is typically straightforward and non-invasive, which is worth knowing before you put off the appointment.
Getting an early opinion is not an overreaction. An assessment that confirms a minor load issue takes one session; attempting to push through a worsening injury can cost you months of training. A physio, in particular, can offer things no general article can: a programme of personalised exercise modifications, patellofemoral taping, manual therapy where appropriate, and hands-on gait retraining tailored specifically to how you move. That individualised input is where lasting improvement usually begins.
This section is general information only and does not constitute medical advice. If you are in pain or have concerns about an injury, please consult a qualified physician or physiotherapist.
The bottom line on runner’s knee
Runner’s knee comes down to three things: understanding why the kneecap loses its smooth tracking, managing the inputs you can actually control, and following a symptom-gated return to running rather than a calendar-driven one. Load management, consistent quad and hip strength work, and appropriate footwear are not separate problems. They are the same problem approached from three angles, and addressing all three together is what moves you from reactive to preventive.
For a recreational runner mid-plan, the honest message is this: runner’s knee is one of the most common running injuries precisely because training load regularly outpaces tissue capacity, especially in the early weeks of a new plan. That does not mean your knee is structurally damaged or that your running days are numbered. It means the demand temporarily exceeded what the knee could handle, and load problems have practical solutions.
If you want to put this guide into practice, Enter2Run’s training plans show you how sensible mileage progression works in a structured schedule, and the shoe guides cover the footwear variables discussed here in concrete, foot-type-specific detail.
Finally, if load reduction and the strength and prevention work outlined in this article are not producing improvement, a physiotherapist is the right next step. More self-research has a ceiling; a clinical assessment does not.